Hair Food

Hi Friends!

Today is a wonderful day! I’m making cup cakes and decorating them with green fondant, hopefully they will look like sprouting plants. My nephew is turning 2 and I think these cupcakes would be perfect.

Enough about my cupcakes, today’s post is about feeding your hair.

Growing up I wasted a lot of time curling, adjusting, flat ironing, washing and braiding my hair. Like most little girls I want to look good all the time and hair plays a big role in your appearance.

I started growing my dreadlocks roughly 7 years ago and it’s been a wonderful insightful journey. Dreads tell a story, they are hard to maintain especially in the beginning stages. I endured over 2 years of the “ugly phase” where I had 100s of small spikes poking out of my head. That’s how everyones dreads start out, an unattractive mess you have to disguise, hide, and suffer through for multiple months.  There is nothing pretty about this part of the dreadlock journey. It took about 2 years for my hair to grow a few more inches, then I looked as if I had been electrocuted, all of my 1-3 inch dreadlocks stood straight up on my head. Finally year 3 came around and they fell, I got to rock a cute bob for a while, this was around the time I met my current boyfriend.

As the years go by my dreads have gotten longer and longer, sexier and sexier. Now I’m 7 years in and I can’t wait to see what they will look like in another 7 years. I get tons of compliments on my hair everywhere I go I’m bombarded with questions about how to wash and maintain them.

Check out my hair and weight evolution! 

It’s crazy!

Hair is part of your identity. I envy the women who chop their hair off in a boyish cut. There is nothing sexier then a confident women with super short hair, in my opinion. I also love long, wavy, curled hair, the way hair flows and shines can be memorizing.

Hair Facts

  • Everyone losses up to 100 strains of hair a day, that’s actually a normal rate of hair loss.
  • 40% of Americans who suffered from thinning hair are women
  • Hormonal change, genetics, and how frequently you use heat on your locks can cause hairs to fall out and thin at an accelerated pace.
  • Hair loss can cause psychological damage by feeling unattractive to people of the opposite sex
  • The American Hair Loss Association recognizes hair loss in women as a serious life altering condition
  • All hair loss in both men and women is a symptom of something else that’s gone wrong in your body

Vitamins that stimulate hair growth:

Vitamin C – Improves circulation of the scalp – found in citrus fruits like oranges, limes and lemons


Vitamin B
– Strengths hair and promotes overall health found in whole grains, potatoes, bananas, lentils, chili peppers, beans, yeast and molasses


Vitamin E – An Antioxidant for the body, improves circulation and supports a healthy nervous system.
Found in green vegetables like spinach, collards, eggs, nuts and seeds

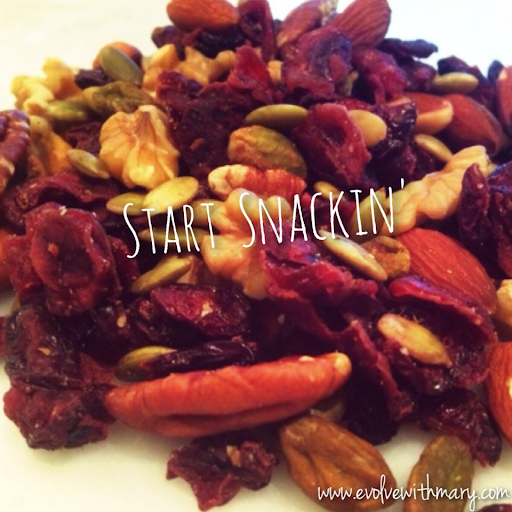
Foods to eat for healthy hair

Pumpkin seeds

Good source of zinc and vitamin A, vitamin b and other essential hair strengthening nutrients

Helps prevent thin, brittle hair while increasing hair growth

Carrots

Raw carrots are best

Good source of beta carotene & vitamin A

Good for shinny

Helps strengthen hair and can increase the shine in healthy hair

Radishes

Good source of Vitamin C, silicon and sulfur

Helps build strong strains of hair

Nutritional Yeast

Good source of anion acids, protein, and vitamin B

Stimulates healthy hair growth

Cucumbers

Good source of silicon

Helps build strong strains of hair and makes hair thick and shiny
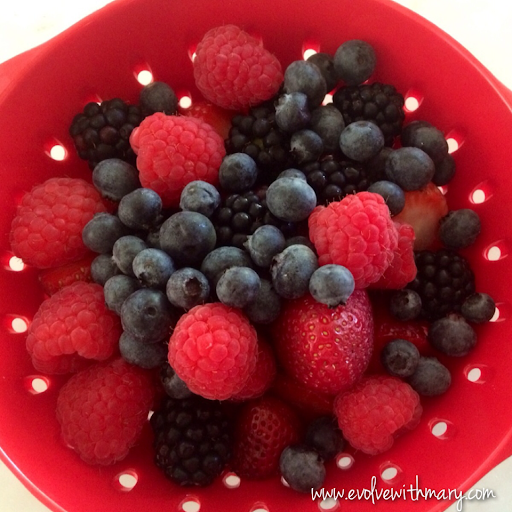
Strawberries

Good source of fiber, vitamin C, and folic acid, contains antioxidants

Helps hair growth

Shiitake Mushrooms

Good source of vitamin B, niacin, and biotin

Helps keep hair and nails healthy and strong


References:
Cosmopolitan magazine
Woman’s health magazine
American Hair Loss Association


Hair Smoothies

I can’t leave you without a few smoothie recipes to stimulate healthy locks. All smoothies are delicious and created by me!

Hair Power

1 cup raw Carrots
1 cup strawberries
1 tsp nutritional yeast
1 cup chopped apples with skin on
2 tsp raw honey or natural sweetener
1/3 cup non dairy milk

Greenie Meanie

1/2 cup cucumbers

1/2 handful pumpkin seeds

1/2 cup pineapples
Handful of kale
1/2 cup chopped apples with skin on
1/3 cup non dairy milk

Spicy Yet Sweet

1 cup strawberries

1/2 cup radishes
1/2 cup mixed berries
1/2 cup mangos
1/2 cup pineapples
1/3 cup non dairy milk

That’s all today folks!
Peace & love,
Mary

Challenge Monday

Fitness Challenge

Lunge… to da side with balance


Challenge Synopsis

I challenge you to complete 4 sets of 12 reps of Side Lunge with Leg Lifts, each side, every day this week


Why Why Why

  • Lunges are one of the “holy grail” leg exercises, same category as squats
  • Side lunges with leg lifts targets glutes (booty), hip flexors, quads and balance
  • Lunges will increase your heart rate within the first 10 reps

Materials

Just yourself


Directions

Side Lunge with Leg Lift

Complete 4 sets of 12 reps, each side

Engage core, place hands on hips, feet slightly closer the hip width apart

Lift left foot 1-2 inches off of ground and take a big step to your left

Lunge to the side dropping your hips bending your left knee close to a 90 degree angle, while right leg stays straight

**Make sure your knee doesn’t go beyond your toes, if it does take a wider step

In lunge position drive off the hell of your left foot to get you back to starting position

As you come up lift your left foot at a 90 degree angle

That’s one rep


My Take

I really don’t have much to say about this one. Lunges work. They shape, tone, and lift the lower body. This exercise is a huge staple in my daily workout routines. 

Nutrition Challenge

Challenge Synopsis

I challenge you to consume foods that stimulate healthy hair growth


Why Why Why

  • 1 out of 4 women have thinning hair, it starts in your 20s and gets more common as we age
  • Hair follicles become less and less active over time, hair gets thinner and thinner and doesn’t grow at all
  • Hair loss can also be caused by aging, illness, damage, stress, diet, hormone imbalance and more
  • Hair needs certain vitamins and minerals to grow
  • A well balanced diet can add essential vitamins minerals and proteins to hair, making it grow faster and healthier

Materials

Foods rich in protein, biotin, vitamin B, niacin, iron folic acid, zinc, amino acids, Vitamin A, Vitamin C…


Directions

Consume foods with high amounts of growing nutrients

I will be featuring tips on stimulating healthy hair growing through the week


My Take

I started my dreadlocks the same time I started my weight-loss journey, about 7 years ago. Before dreads my hair never grew past my shoulders. Hair is a big part of a woman’s identity and I’ve never felt more beautiful and sexier as I do now with my long, thick, healthy, mane. This weeks challenge should stimulate even more healthy hair growth. My goal is to grow my dreads down to my butt. I think I have at least 5 more years to reach that goal. Maybe this new diet could speed up the process. 

Self Improvement Challenge

Challenge Synopsis

I challenge you to send some love to people you love i.e. y family, best friends, co workers, high school friends, college buddies…


Why Why Why

  • Life gets hectic and it’s easy to loose touch with people that mean the most to you
  • The holiday season is right around the corner, by reaching out now it gives you more time to reconnect
  • Everyone needs love and support, some people may seem OK on the outside, but are hurting on the inside 
  • Sending a card, text or making a phone call can/could really brighten someones day
  • Reaching out to encourage, support, cultivate relationships adds joy to your life and others 

Materials

Friends, family, co-workers, significant others, high school friends, college buddies…


Directions

  • Make a list of your most cherished relationships *make sure not to leave anyone out, include Mom and Dad, if they are important to you
  • Brainstorm ideas on how you could surprise, send support or improve your relationship
    • for example: My Grandparents are getting older, but both of them are in good health so I take my relationships with them for granted. This week I’m send them the wreaths I made during craft week. I know they will both appreciate it. It doesn’t make up for missed phone calls, but it does show them I was thinking about them
  • Actually follow through 
    • Send an edible arrangement to your sister who just started a diet
    • Text your mother on a random day and time to remind her that you love her
    • Call you BFF and left him/her vent about whatever is going on in their life

My Take

This challenge is special to me for many reasons. I’ve been feeling a little lonely lately, it’s easy to feel alone in the big world. My family and friends are always there to support me and sometimes I take them for granted. Over the last few weeks I’ve been sending everyone I love a little something special. This challenge also gives me an excuse to craft and create. I plan on making more wreaths and sending them to my family, friends, and my neighbors. I want everyone to know how much I love them before the holiday season comes around. 


That’s all today folks!

Peace & Love, 

Mary  

Challenge Monday

Fitness Challenge 

Lay Down & Kick Those Legs


Challenge Synopsis
I challenge you to complete by laying leg kick series everyday this week

Why Why Why

  • This exercise targets lower abdominals, rectus abdominal and obliques 
  • You get to lay down and kick your legs, what’s easier then that?
  • This exercise series requires nothing but a comfy hotel bed or an exercise mat

Materials

  • Will Power
  • Strength 
  • Disciple
  • Strong mind
  • Exercise mat 

Directions

Laying Leg Kicks

Laying on your back, engage abdominals and extend legs straight up in the air

Bend left leg and extend it straight out about 1-2 inches from ground 

Return leg to starting position 

Now bend right leg and extend it straight out about 1-2 inches from ground 

Returned to starting position

Bend both legs and extend them straight out about 1-2 inches from ground 

Repeat series adding an extra rep until you reach 5 reps in total

My Take 
This video was painful. I had to re-shoot 5 times just to get it right. It’s a good progressive workout that challenges your entire core. By the 4th rep you’re ready to give up. It’s strange working up a sweat while laying in bed. Enjoy! 

Nutrition Challenge
Eat Dark Chocolate

Challenge Synopsis

  • Add 2 small squares of dark chocolate to your diet everyday this week
  • Make sure it’s at least 60% cocoa 

Why Why Why

  • 2 smalls squares of dark chocolate can boost your brain power, heart health, energy, enhance your mood, curb your sweet tooth and spark weight loss
  • 2 ounces of dark chocolate can decrease risk of stroke by up to 20%
  • Research shows regular chocolate eaters are slimmer then those who abstain 
  • Cocoa butter fats trigger natural endorphins 

Materials

  • Dark chocolate that contains 60% more more raw natural cocoa 

Directions

  • Eat up to 2 small squares (about 2oz) of dark chocolate daily

My Take
I am a huge fan of dark chocolate. That’s the only chocolate I really enjoy. White chocolate is too sweet and has no nutritional value and milk chocolate is too creamy to me. Keeping small squares of dark chocolate around curbs my sweet tooth. This week’s nutrition challenge should be an easy one to pull off. 


Self Improvement Challenge

Dance like no one is watching

Challenge Synopsis
I challenge you dance like a crazy person a few times this week

Why Why Why

  • Dancing like no one is watching allows you to love your body without worrying about looking cool and finding beat
  • Dancing relives stress and anxiety 
  • Dancing can make you feel euphoric and on top of the world
  • Dancing is an effective and fun way to burn calories 

Material

  • Good music 
  • That’s all you need 

Directions

  • Put the kids and the husband/wife to  bed
  • Put on pandora or your favorite artist
  • Now DANCE DANCE DANCE! 
  • Let loose and let your body move 
  • Don’t worry about how you look or your dance moves
  • Just let go and DANCE

My Take
Growing up, my sister and I always listened to the radio while getting ready for school. 4-5 days a week we had dance contests. I lived alone during most of my 20s and 3-4 nights a week I turned up some tunes and danced my little butt off. I’ve been in a long term relationship and my boyfriend knows 5-6 days a week I’m going to dance around the house like a total idiot. He even joins in sometimes. Dancing relieves stress, is fun and is a great workout. I hope you enjoy this weeks challenge.

That’s all today folks!

Peace & Love,
Mary

Mossy RIP Wreath

Hi Friends,

Happy Friday 

I had a wonderful time crafting this week, I hope I inspired you to get creative and make something cool. 

The project featured today was very time consuming, I don’t like the way it photographed, but the final product is funky and original.  You get to free style with all of the props and put your own personal touches on it. When shopping at Michael’s I found myself in the Halloween aisle grabbing large plastics spiders, rubber bats, moldy moss, skeleton hands and wooden skulls. 

Let’s jump right into this tutorial


Mossy RIP Wreath


Cost: $20-$25
Time: 60-90 minutes 
Skill level: beginner 

What you need:

Moldy Moss 2-3 packs $2.99 each
Medium sized stick wreath – $9.99
Clear drying glue or a glue gun – $3.99
Halloween themed plastic toys like spiders, rats, skeletons, bats, etc

I found wooden skulls and a RIP sign then decorated them using the crayon wax technique

This step is optional 

Directions 

Start by lining your work surface with a black garbage bag

Glue moss onto wreath 
I covered the entire wreath but you can leave a few sticks pointing out of the moss, it’s all up to you

hot glue gun next time to speed up the drying process

Allow time for moss to dry and pre-arrange your plastic Halloween props before gluing

Once your happy with the layout hot glue props to wreath 

all props need to be securely held in place since your wreath will be exposed to the elements for an extended amount of time

Allow 5 minutes to fully dry

Hang and enjoy!


Have an Awesome weekend!

Peace & Love,
Mary

DIY Burlap Wreath

Hi Friends,
I’m thinking about doing craft week once a month. I absolutely adore crafting, creating things with my hands and pushing my creative limits. I feel creative, strong and brave when I try a new techniques, like this next tutorial.

My candle holders turned out excellent. I can’t stop running my hand up and down the wax covered bottles. They look cool and feel soft yet hard, if that makes any sense. 

Today’s craft is a burlap wreath. I was intimated by this project but I believe I can accomplish anything and tried it anyway. Of course it was easy as pie and fun. My material calculations where wrong and I ran out of burlap. Good thing for me I purchased another roll, which came I handy. If you look closely you can see the different colors, but who really cares? I know I don’t.

I like this craft, but I also feel as if it’s missing something. I’m not sure of I’m going to post this project on my other social media accounts. Lucky for all of you it made it to this blog.

Let’s dive in and get down and dirty with some burlap

Burlap Flower Wreath 


Cost: $20-$25
Time: 60-90 minutes 
Skill level: beginner to intermediate 

What you need:
3-4 rolls Burlap (about 30 feet, 5-6 inches wide) $2.99-$3.99 each
Wire Wreath $4.99
Glue gun and plenty of glue sticks
2 Holiday themed burlap ribbon $2.99
Scissors
White or black felt $.99
Floral wire $2.99


Directions 

Staring with your wire wreath

Weave floral wire into the end of your burlap, scrunch together and secure it to wire wreath

Cut burlap into manageable sections 

Weave burlap in and out of each wire section leaving 4-5 inches of burlap outside of wire wreath

Make sure to a scrunch burlap creating bubbles

Once you run out of burlap secure it to wire wreath with floral wire

Complete this process covering 3/4th of the wreath

Now comes the fun part

Burlap flowers

Using the holiday themed burlap ribbon 

Cut 2 feet of ribbon 

Cut ribbon in half width wise

Start flowes by rolling the ends 3-4 times, this will be the middle of your flower

Take your time and wrap decorative burlap around and around, twisting every other round to create a flower 

Use hot glue, glue burlap flower to a small piece of felt to secure 

Continue creating 12-15 flowers 

Glue flowers to wire wreath

Create big bow from decorative burlap ribbon using this technique 

Attach bow with hot glue gun 

Allow 5 minutes to dry 

Enjoy your impressive homemade wreath.


That’s all today folks!
Peace & Love,
Mary 

Sent from my iPhone

Spooky Candle Holders

Hi Friends,

I hope you are enjoying craft week as much as I am. If you have been following my blog for a while you know the crayon wax technique. It’s relatively easy to create while looking and feeling like something you would splurge on in the store.

I have mason jars hanging around the house and thought I would melt some black crayons on the outside of the jar to create a spooky candle holder or flower vase. Adding the twine and making a noose like handle keeps the spooky Halloween theme alive.

The crafts will be getting more advanced as the week continues, this one is simple, the kids or husband can join in on the fun.

Spooky Candle Holder

Cost: $15-$20
Time: 20-30 minutes
Skill lever: Beginner

What you need:
Black, Purple, Sliver crayons – $3.99
2 Small Mouth Mason Jars –  $1.50 each
Blow drier or embossing tool – FREE
Twine – $2.99


Directions

Start by lining your work surface with a large garbage bag


Melt crayons spraying wax over bottle by holding blow drier 2-3 inches away from mouth of mason jar 
As crayon melts make sure to move it around covering the entire bottle in wax
Continue add new crayons colors melting wax all over bottle top
Layer your colors
I went purple, black then silver
Allow 5 minutes to fully dry

Follow these directions to create 2 nooses out of twine to hang your bottles

Add some candles or a few flowers and Enjoy

That’s all today folk’s 
Blessings,
Mary 

Mossy Pumpkin Wreath

Hi friends,


Today we are making a mossy pumpkin wreath. Wreaths are an easy crafting project to tackle on a lazy Saturday or during the week. Why not decorate your front door with creative DIY projects? The entire neighborhood, and everyone that drives by, will get to admire your crafting skills.

I love winter squash. They are a rich source of plant based anti-inflammatory nutrients like omega 3s and beta-carotene. These nutrients strengthen the immune system, which protect the body against sickness. 
Not only are they good for you, they are festive and fun to decorate with. Every year I purchase mini pumpkins and place them throughout my house.

Pumpkins seem to turn up everywhere: pumpkin pie, pumpkin muffins, carved pumpkins, curries pumpkin, and pumpkin spiced lattes…

Adding mini pumpkins to this simple wreath makes it perfect for the beginning of this holiday season.
Let’s dive into this tutorial


Mossy Pumpkin Wreath

Cost: $20-$25

Time: 30-60 minutes

Skill level: beginner
What you need:


Medium sized stick wreath – $9.99
Clear drying glue or a glue gun – $3.99
Foam winter squash/pumpkins – $3.99 smaller ones work best for this project
Ribbon – $2.99
Moss – $4.99 
I purchased everything from Michael’s, they have some wonderful coupons that I took advantage of
Start by lining your work surface with a black garbage bag
If you check out the pictures you will notice I started gluing without lining my surface which created a huge mess on our wooden table, oh well
Glue moss onto wreath
Have fun with this part, try to leave a few sticks pointing out of the moss 

I used tacky glue, but it took longer to dry then I expected

I would use a hot glue gun next time to speed up the drying process


Allow time to dry and pre-arrange your foam winter squash before you start gluing it on your moss covered wreath


Once your happy with your lay out start gluing

A hot glue gun is needed for this step, the foam squash is light but needs to be securely held in place since it’s going to be exposed to the elements for an extended amount of time

Create a bow by cutting ribbon into a 8-10 inch strip
Fold ribbon strip in half and use fold as a guide
Glue both ends of ribbon to the middle of the strip 
Take another piece of ribbon (I cut mine in half lengthwise) and wrap it around the middle of your glued strips
It should start to look like a bow 
Fold ribbon in half horizontally and hot glue it together 
Now cut 2 strips of ribbon and glue them to the back of your bow
You just created an easy ribbon bow

Decided where you want to place your ribbon and hot glue it on to wreath
Allow wreath 10 minutes to fully set

Hang it on your door for the world to see.
How much fun was that? This tutorial is easy to follow, kid friendly and impressive. 
That’s all today folks,
Peace & Love,
Mary 

Happy Challenge Monday

It’s Challenge Monday!

Let’s get to it!

Fitness Challenge
Enjoy my plank dips

Challenge Synopsis
Complete plank dips everyday this week

Why Why Why

  • I’ve said it before and I will say it again, planks are one of the most effect core exercises out there
  • Planks dips target your core, endurance, upper body, balance, and lower body, pretty much your entire body get a pump from this exercise

Materials

  • Will Power
  • Strength 
  • Disciple
  • Strong mind
  • Exercise mat 

Directions

Complete 4 sets 12 reps of everyday this week

*This exercise is advanced if it is too hard stick with regular planks holding them for 60 seconds 4 sets 

Staring in a plank position
Hands directly under shoulders, feet hip width apart
Engage your core and dip your hips to the right and left
Make sure to keep your hips low, they will want to hike up to make the movement easier
That’s one rep

My Take
Plank dips are effective they find their way into my workout on a weekly bases. I like to challenge my balance why holding a plank and reminding myself to keep my hips down. You should love this one or at least learn to love it.

Nutrition Challenge


Challenge Synopsis
I challenge you to incorporate 2-3 healthy snacks into your daily everyday this week

Why Why Why 

  • Eating healthy snacks in between meals helps curb your appetite which aids in healthy weight loss
  • Healthy snacks are natural energy booster
  • Snacking regularly helps regulate your mood
  • Eating healthy snacks can boost brain power and increase your productivity

Materials

  • Healthy snack foods like:
  • Fruit
  • Raw vegetables
  • Yogurt
  • Smoothie
  • Salads
  • Protein bars
  • Mix nuts or trail mix
  • Boiled eggs
  • Smoked salmon
  • And this list goes on and on and on

Directions

  • Incorporate a healthy snack in between breakfast, lunch and dinner…It’s as simple as that 
  • Replace coffee and vending machine snacks with fresh healthy ones

My Take
I used to avoid snacking with fearing  extra food would make me gain weight. A few weeks ago I decided to give this snacking thing a try and I never looked back. Not only am I losing weight but I’m less hungry. I get to eat more and loose weight it’s a win win in my book. Now get to snacking. 

Self Improvement Challenge


Challenge Synopsis
I challenge you to craft throughout week 

Why Why Why

  • Studies prove crafting can help ease stress, increase happiness and improve your health 
  • Crafting helps those suffering from anxiety and depression 
  • Crafting has positive effects on the brain 

Materials

  • A few crafting tutorials  
  • A little extra time
  • A lot of imagination 

Directions
Pick out a crafting project that looks fun and tackle it
Of course I’ll be posting some tutorials for all of you to try

My Take

I’m making a few Fall and Halloween themed reefs this weeks. I can’t wait to get started. I found a few pictures of inspiration but I plan on making things up as I go. I’m going to do a little impromptu crafting and I’m so excited I just can’t hide it. 

That’s all today folks,
Peace & Love,
Mary 

Happy Fleet Week

Hi Friends,

Happy Friday
&
 to those of you who live in the Bay Area 


I’ve lived in The Bay Area for the last 12 years and been a part of many fleet weeks, but this is the first year I actually got to board a ship. 

I was lucky enough to explore the USS America it houses over 1500 sea-men, sea-women and officers.

This was probably one of the coolest experiences of my life.

Check out my pictures!


That’s all today folks!
Enjoy your weekend
Peace & Love,
Mary 

Tips to cut your sodium intake

Hi Friends!

I took a break from writing yesterday but I’m back and ready to work. I was diagnosed with high blood pressure when I was 12 years old, my doctor made me come into the hospital once a week to keep an eye on it. It was an annoyance but slowly it improved. I had no idea why my blood pressure was be high at such an young age until now. Looking back my diet was horrible. We ate southern style, that’s lots of butter, salt and pork. Not much processed food, just delicious un-nutritious fried foods that contained an absurd amount of sodium.

Looking back at my past I realize why I’m now slightly obsessed with everything that goes into my mouth. I love having control over my diet. I love eating salads and vegetables everyday. I enjoy restricting my diet at my whim. All those years of not caring are long behind me.

A lot of my family are still dealing with symptoms of eating high sodium foods. Some get bloated, some go to the doctor on a regular bases and some just ignore it. 

These tips will help you cut down on your sodium intake which can lead to heart disease and the thinning of artery lining among other things.

Read labels


  • Purchase “low sodium” products when buying processed foods
  • *the best bet is to avoid processed foods all together
  • Eat whole grain rice and past that does not have any added seasoning or unnatural flavoring 

Eat more fresh foods

  • Most fruits and vegetables are low in sodium
  • Avoid processed lunch meat, bacon, hot dogs, sausage, and ham
  • Eat fresh meat instead
  • Ask your local butcher or read labels to make sure your fresh or frozen meat hasn’t  been injected with a solution that contains high amounts of sodium

Cut the salt from recipes 


  • Purchase cookbooks that focus on lower blood pressure and sodium content 
  • Use herbs, spices and other flavoring a to season foods instead of salt based dried seasoning 
  • Fresh herbs, dried herbs, spices, zest and fruit juices can add a lot of flavor to any dish 
  • **sea salt has around the same amount of sodium as table salt

Limit salty condiments like


  • Soy sauce, salad dressing, dips, ketchup, mustard, and relish 
  • Use salt substitutes sparingly.

These tips should help you cut down on your sodium intake. 

That’s all today folks,
Peace & Love
Mary

References:
www.mayoclinic.org